Skip to content
No products in the cart.
Uncategorized
7 Mistakes You’re Making with Drywall Texture Matching (and How to Fix Them)
15
Jul
Jul
I. Introduction: The Art and Science of the Invisible Repair
Have you ever walked into a room and immediately noticed a “scar” on the wall, a patch that looks like it was stuck there as an afterthought? We’ve all seen it. Whether it was a repair from a plumbing leak or a hole from a relocated TV mount, the structural fix might be solid, but the drywall texture matching is where most DIY projects (and even some “pro” jobs) fall apart.
Achieving a seamless blend between a new patch and an existing wall is more than just a finishing touch; it is a specialized craft that combines technical knowledge with artistic finesse. In this comprehensive guide, we are going to walk you through the most common pitfalls homeowners and property managers face when attempting to match textures like orange peel and knockdown.
By the end of this article, you’ll gain valuable insights into why your past attempts might have looked “off” and, more importantly, you’ll be equipped with the knowledge to execute professional-grade repairs. We will dive deep into the mechanics of spray pressure, mud consistency, and the specific challenges of the Orange County drywall landscape.
II. Understanding the Texture Landscape: Orange Peel and Knockdown
Before we dive into the mistakes, it’s essential to understand what we are trying to replicate. Most homes in California, particularly across Orange County, utilize two primary styles:
- Orange Peel: This is a fine-to-medium splattered texture that resembles the skin of an orange. It is created by spraying small droplets of joint compound onto a smooth surface.
- Knockdown: This is a more dramatic, rustic look. Large droplets are sprayed on the wall, allowed to “set up” for a few minutes, and then lightly flattened (or knocked down) with a wide squeegee or trowel.
Each of these requires specific tools and a steady hand. Understanding the subtle differences in “peaks” and “valleys” is the first step toward a successful repair.

III. 7 Common Drywall Texture Matching Mistakes
Now it’s time to analyze the most frequent errors. By identifying these mistakes early, you can avoid the frustration of a visible patch and save yourself from the “do-over” cycle.
1. The “Spray Can” Trap: Inconsistent Air Pressure
One of the most common DIY fails is relying solely on aerosol texture cans from a big-box store without understanding their limitations. These cans lose pressure as they are used. The first spray might produce a beautiful orange peel, but as the propellant runs low, the droplets become larger and more erratic.
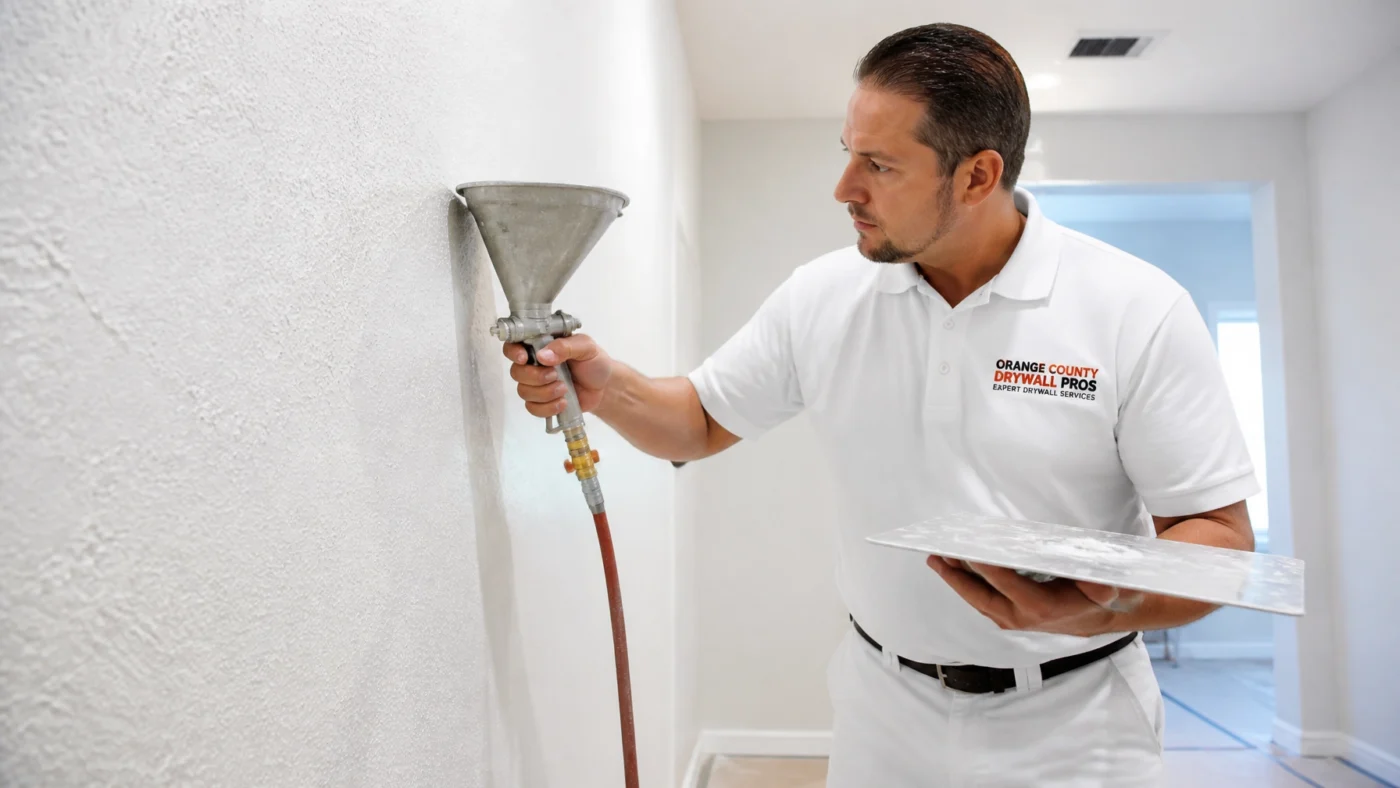
How to Fix It: Always keep your cans at room temperature (warm them in a bowl of warm water if they are cold) and shake them for at least two minutes. However, for a truly professional finish, we recommend using a hopper gun and an air compressor. This allows for consistent air pressure, which is crucial for a uniform pattern.
2. The “Island” Effect: Failing to Feather and Blend Edges
If you apply texture only to the area of the patch, you create what we call an “island.” There will be a visible ridge where the new texture stops and the old texture begins. This is a dead giveaway of a DIY repair.
How to Fix It: You must feather your texture. This means spraying the texture lightly onto the existing wall, extending about 6 to 12 inches beyond the patch. By tapering the density of the spray as you move outward, you trick the eye into seeing a continuous surface.

3. The “Pancake Batter” Problem: Incorrect Mud Consistency
Whether you are using a hopper or a hand-application method, the viscosity of your joint compound is everything. If the mud is too thick, it will clump and look heavy (over-textured). If it’s too thin, it will run down the wall or create a texture that looks “melted.”
How to Fix It: Professional drywallers aim for a consistency similar to heavy pancake batter. It should be thick enough to hold its shape but fluid enough to atomize through a nozzle. Always mix your mud thoroughly to remove “goobers” (small lumps) that can clog your equipment.
4. The “Timing” Tumble: Knocking Down Too Early (or Too Late)
When working with knockdown texture, timing is the most critical variable. If you “knock it down” too early, the mud will smear into a flat, messy blob. If you wait too long, the mud will harden, and you’ll end up with sharp, jagged peaks that won’t flatten.
How to Fix It: Depending on the humidity and temperature of your room, the “wait time” is usually between 3 to 10 minutes. Watch for the “sheen” to disappear. When the droplets look matte rather than shiny, it’s time to use your knockdown knife with a very light touch.
5. The “Dirty Secret”: Skipping Primer and Paint Sheen Matching
You’ve matched the texture perfectly, congratulations! But then you paint it, and the patch is still visible. Why? Because you skipped the primer. New joint compound is incredibly porous. If you apply paint directly to it, the mud will “suck up” the moisture, causing the paint to look flatter or a different color than the rest of the wall.
How to Fix It: Always apply a high-quality primer-sealer to the textured patch before painting. Additionally, remember that paint sheen (flat, eggshell, satin) changes over time. You may need to paint the entire wall from corner to corner to ensure the “sheen” matches across the board.
6. The “Blind Leap”: Not Performing a Test Patch
It is a mistake to make your first spray directly onto the wall. Every wall has a unique “fingerprint” of texture based on the original contractor’s equipment and technique.
How to Fix It: Use a piece of scrap drywall or a large piece of cardboard to perform a test patch. Adjust your nozzle size, air pressure, and distance from the surface until your test piece matches the wall perfectly. Only then should you move to the actual repair.

7. The “Tool” Trouble: Using the Wrong Nozzle
Using a fine nozzle for a heavy texture or a large nozzle for a light orange peel will never yield a match. Many DIYers try to “force” a tool to do a job it wasn’t designed for.
How to Fix It: Ensure your hopper gun has interchangeable nozzles. Matching the droplet size of the existing wall is non-negotiable for a seamless wall restoration.
IV. Professional Equipment: Why It Makes the Difference
In this section, we want to emphasize that while DIY is possible for small dings, larger repairs usually require professional-grade machinery. A handheld aerosol can cannot replicate the volume or the sustained air pressure of a commercial texture hopper.
At The Drywall Patch Guys, we use industrial-grade compressors that allow us to dial in the exact PSI (pounds per square inch) needed for your specific home. Whether it’s the fine stipple of an older Huntington Beach cottage or the heavy knockdown of a new Newport Beach estate, the right equipment is the foundation of a “disappearing” patch.

V. Safety and Professional Recommendations
Safety should always be your top priority. When texturing and sanding, keep these points in mind:
- Respiratory Protection: Drywall dust and spray particles are hazardous to your lungs. Always wear an N95 mask or a respirator.
- Eye Protection: Texture spray has a way of finding its way into your eyes. Wear safety goggles.
- Floor Protection: Texture gets everywhere. Use heavy-duty drop cloths and plastic sheeting to protect your furniture and flooring.
If you find yourself overwhelmed by the technicalities of viscosity, PSI, and feathering, it’s important to know when to call in the experts. Sometimes, a DIY “fix” ends up costing more in the long run when a professional has to come in and sand down a poorly matched texture. You can read more about the DIY vs. Professional debate here.
VI. Frequently Asked Questions (FAQ)
Q: Can I use a sponge to match orange peel texture?
A: While possible for very small areas (less than an inch), a sponge rarely replicates the “splatter” look of a spray. It often looks too uniform and “bumpy” rather than “peeled.”
Q: How do I match texture on a wall that has been painted 10 times?
A: This is one of the hardest scenarios. Multiple layers of paint soften the edges of the original texture. You may need to apply your texture and then lightly “knock it down” or sand it once dry to mimic those softened, rounded edges.
Q: Why does my patch look darker than the rest of the wall?
A: This is likely a “flashing” issue caused by not using a primer. The new mud absorbs the paint differently, affecting how light reflects off the surface.
Q: Can I match texture if I don’t know the original brand of mud used?
A: Yes. Most professional-grade joint compounds behave similarly once mixed to the correct consistency. The technique and tool are more important than the brand.
VII. Conclusion: You Can Achieve a Flawless Finish
Matching drywall texture is a challenge, but by avoiding these seven common mistakes, you are already ahead of the curve. Remember that patience is your best tool. Take the time to mix your mud correctly, always perform a test patch, and never skip the priming phase.
We hope this guide has provided you with the detailed, actionable advice you need to tackle your next project with confidence. However, we also know that your time is valuable. If you want the peace of mind that comes with a 100% seamless repair, The Drywall Patch Guys are here to help. From Newport Beach to Fullerton, we specialize in making the “un-matchable” disappear.
Now that you’re equipped with the knowledge, it’s time to turn that eyesore of a patch into a perfectly blended part of your home!