Uncategorized
Does Your Drywall Patch Really Need a Pro? Here’s the Truth for 2026

Jan
You’re staring at that hole in your wall. Maybe it’s from a doorknob that got a little too enthusiastic. Maybe it’s a crack that appeared out of nowhere. Or maybe the plumber left behind a gaping mess after fixing your pipes. Now you’re wondering: should I tackle this myself, or call in the pros?
It’s a fair question: and one that homeowners ask us all the time. In this comprehensive guide, we’ll walk you through exactly when DIY drywall patching makes sense and when it’s time to pick up the phone and call a professional. By the end, you’ll be equipped with the knowledge to make the right call for your situation, your budget, and your sanity.
I. Understanding the Basics of Drywall Damage
Before you decide who’s going to fix that wall, it’s essential to understand what you’re dealing with. Drywall damage comes in many forms, and not all damage is created equal.
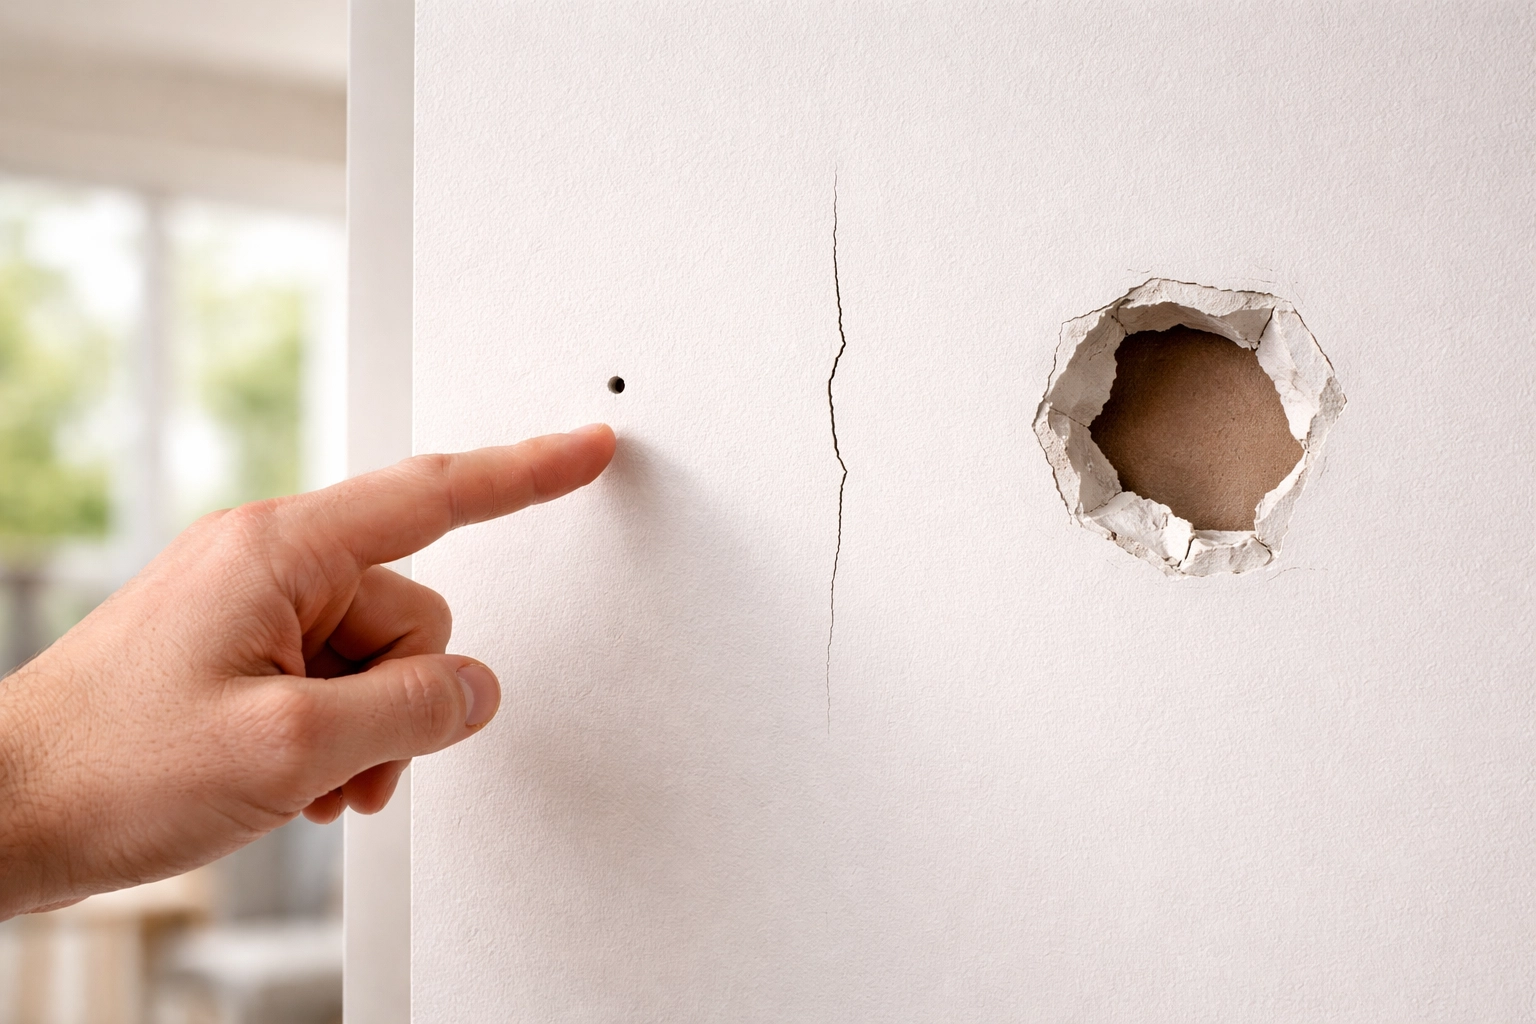
Minor damage includes:
- Small nail or screw holes
- Hairline cracks
- Small dents and dings
- Popped nail heads
Major damage includes:
- Holes larger than 6 inches
- Water-damaged drywall
- Extensive cracking patterns
- Sagging or bulging sections
- Damage that extends to the framing
The type and extent of damage you’re facing is the single biggest factor in determining whether you need professional help. In this section, we’ve outlined the basics: now let’s dig into when DIY is a solid choice.
II. When DIY Drywall Patching Works Just Fine
Here’s some good news: many small drywall repairs are totally doable on your own. If you’re reasonably handy and have a free afternoon, you can handle these common fixes without calling anyone.
Small Holes and Dents
That nail hole from the picture frame you moved? A small dent from furniture bumping the wall? These are perfect DIY projects. All you need is:
- Spackle or joint compound
- A putty knife
- Sandpaper (120-150 grit)
- Paint to match
The process is straightforward: fill, let dry, sand smooth, and paint. Total cost? Usually under $20 for materials.
Hairline Cracks
Minor cracks that aren’t spreading or recurring can often be filled with joint compound. Apply a thin layer, let it dry, sand, and repaint. Easy.
Patch Kits for Medium Holes
For holes up to about 4-6 inches, hardware stores sell self-adhesive patch kits that make the job manageable. These kits run between $10 and $55 and include everything you need. With some patience and a YouTube tutorial, most homeowners can get decent results.
The DIY Bottom Line
If your damage is small, isolated, and you’re not concerned about achieving a perfectly invisible repair, go ahead and tackle it yourself. You’ll save money and learn a useful skill in the process.
III. When You Should Absolutely Call a Professional
Now it’s time to talk about when DIY becomes a bad idea. There are several situations where calling a professional drywall contractor isn’t just recommended: it’s crucial.
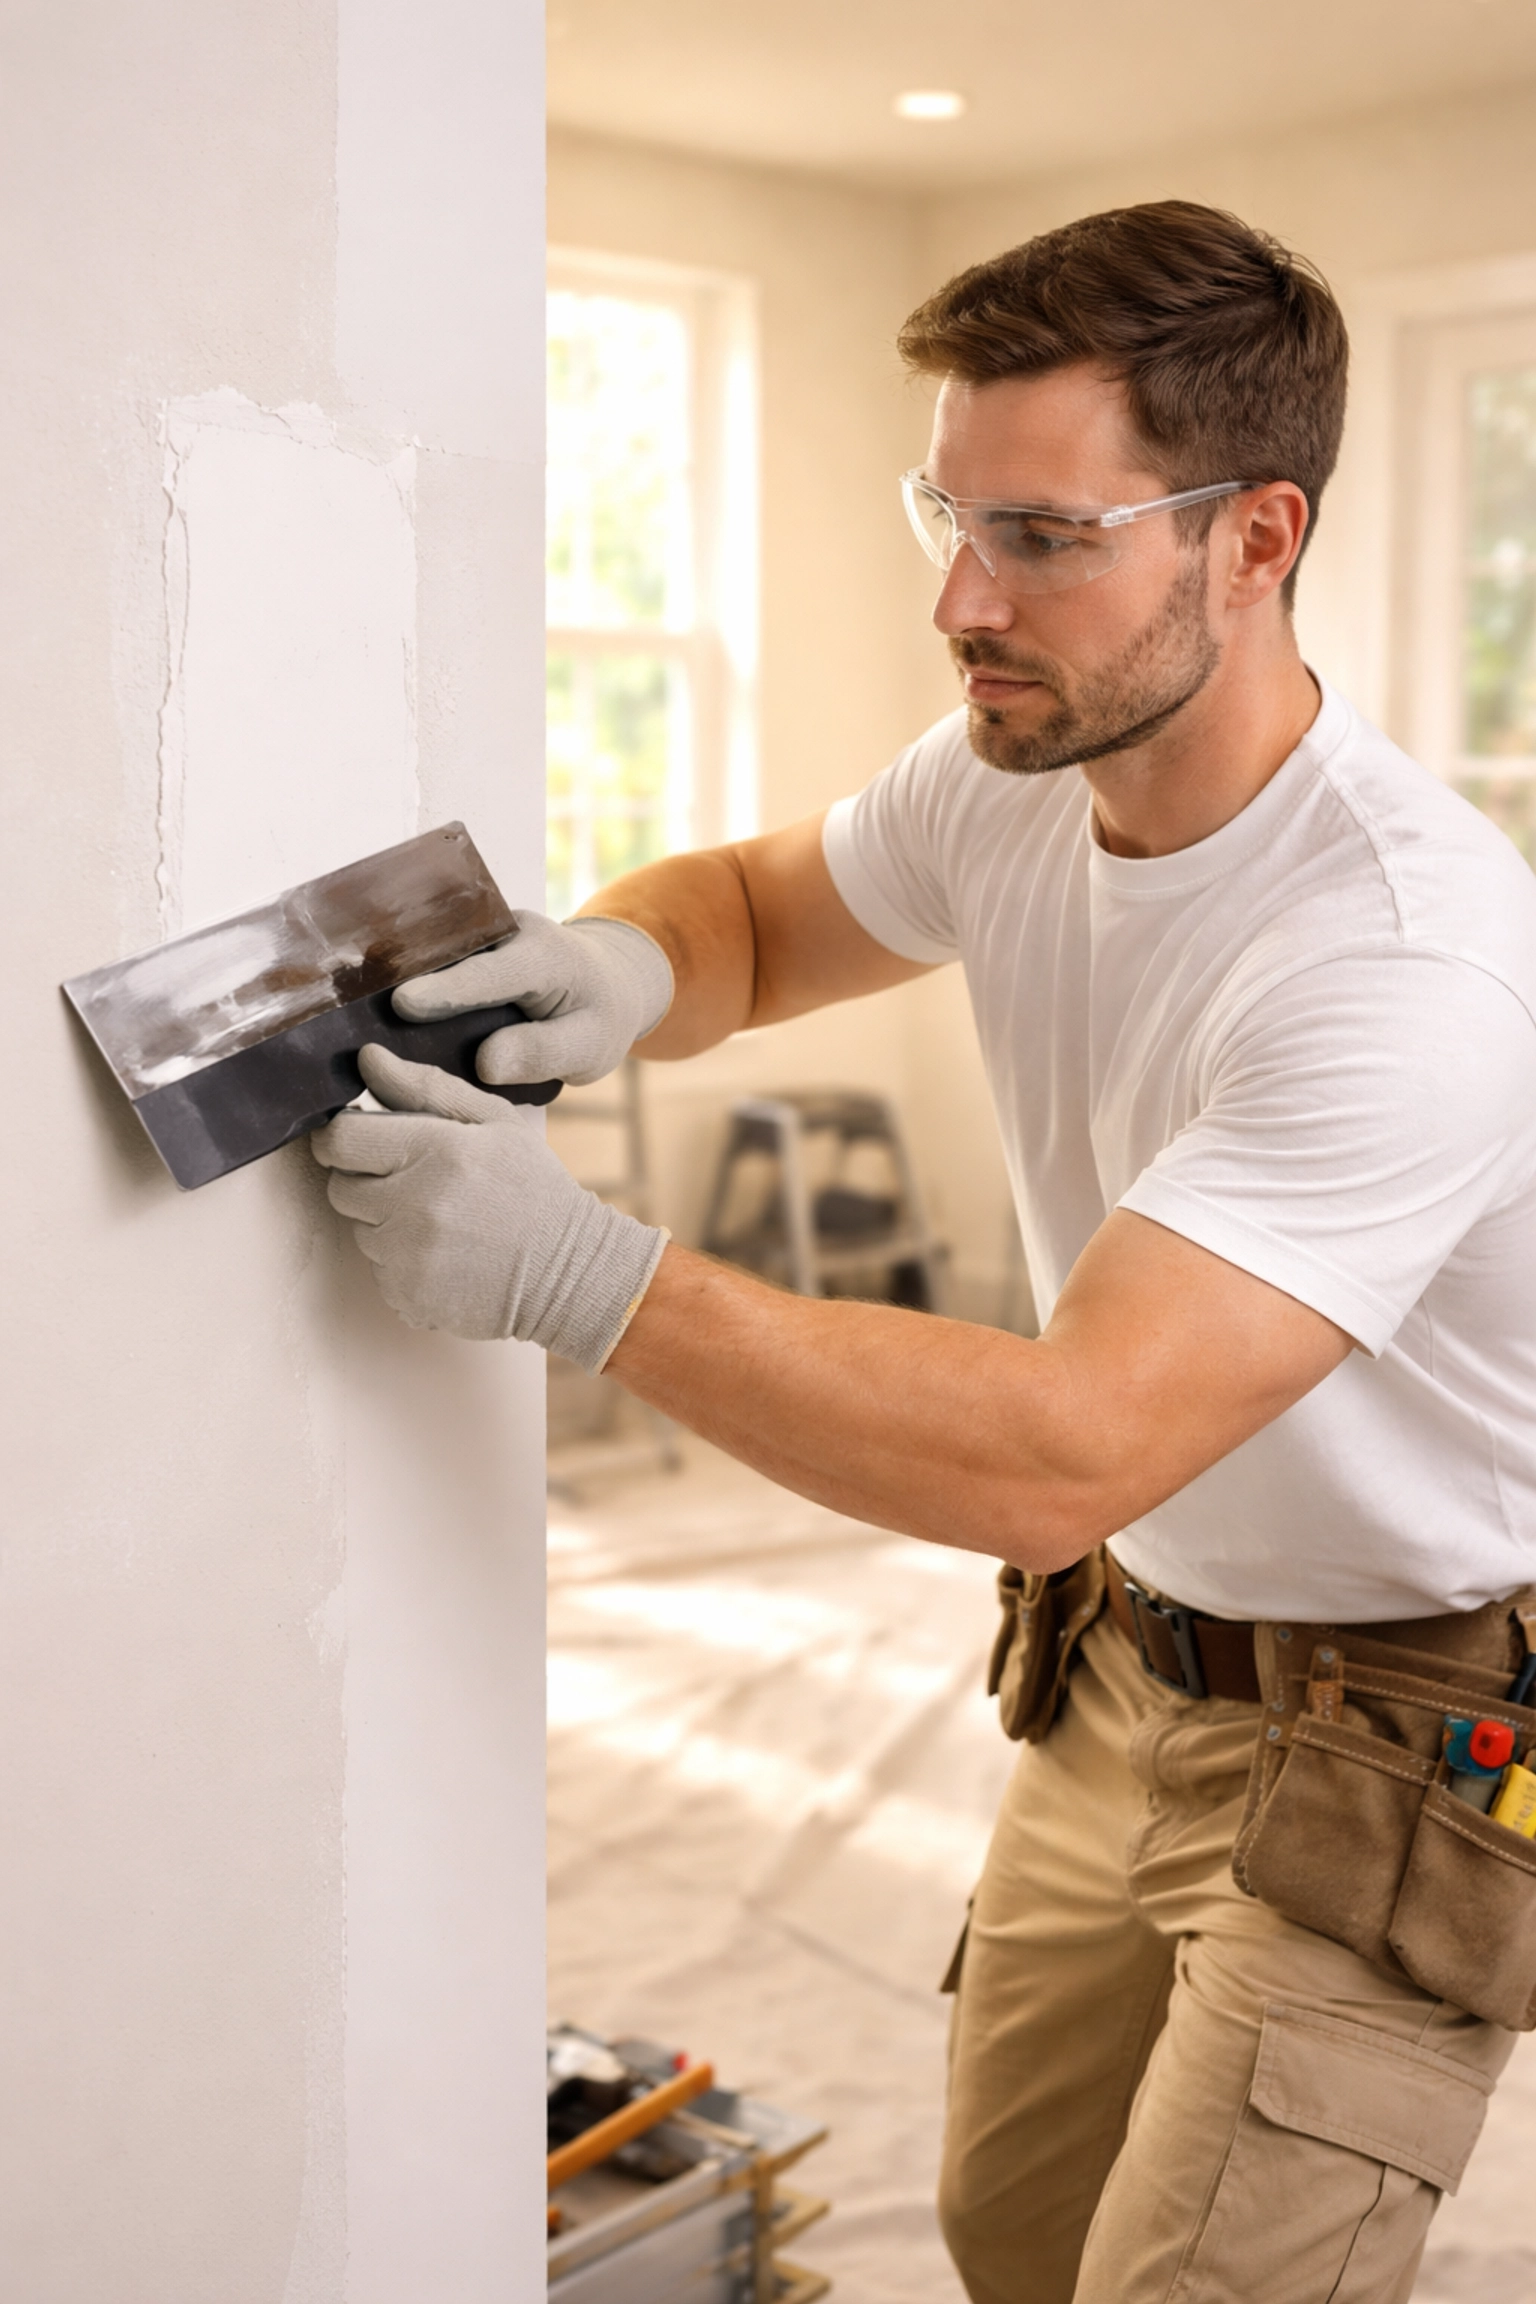
Large or Complex Damage
Anything bigger than 6 inches generally requires cutting out the damaged section and installing a new piece of drywall. This involves measuring, cutting, securing to studs, taping seams, applying multiple coats of mud, and sanding. It’s a multi-step process that takes skill to execute properly.
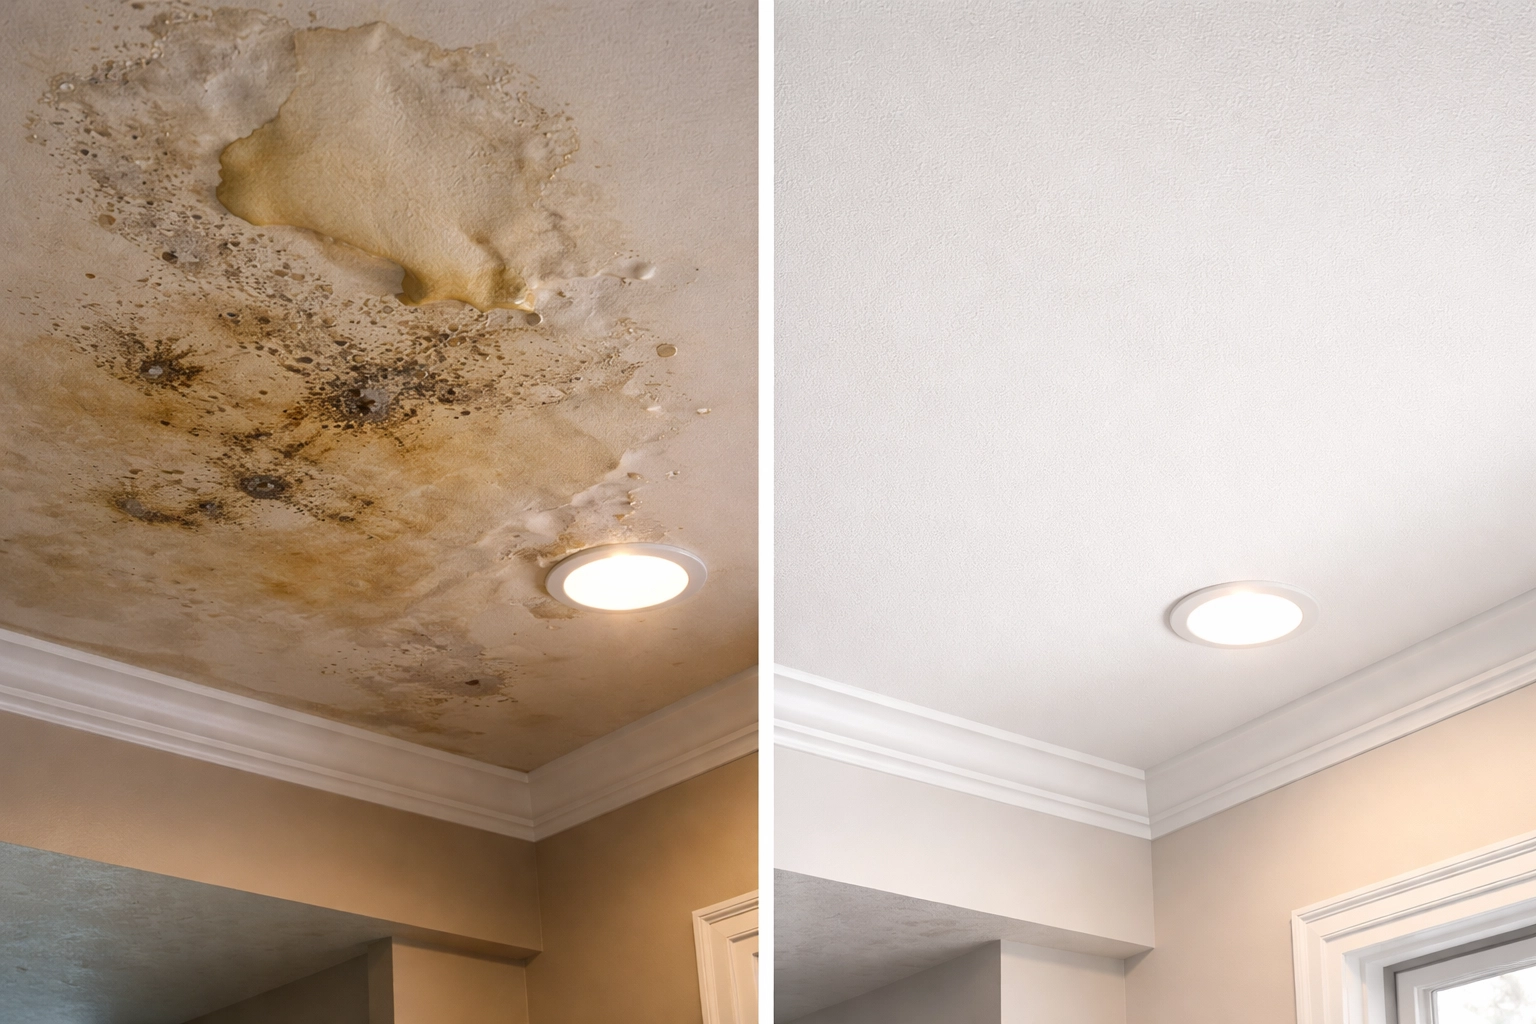
Water Damage
This is a big one. Water-damaged drywall isn’t just an aesthetic problem: it’s a potential health and structural hazard. Water damage can hide:
- Mold growth behind the wall
- Compromised structural framing
- Ongoing moisture issues
A professional can assess the full extent of the damage, address any mold concerns, and ensure the repair is done right. Trying to patch over water damage without addressing the root cause is like putting a bandage on a broken bone. If you’re dealing with water damage, we recommend checking out our guide on water damage restoration for more information.
Texture Matching
Here’s where many DIY projects fall apart. Your walls likely have a specific texture: knockdown, orange peel, smooth, or something else entirely. Matching that texture so the repair blends seamlessly? That’s genuinely difficult without experience and the right equipment.
Professionals have spray rigs, specialized tools, and years of practice achieving that invisible repair. If your walls are in a visible area and you care about aesthetics, this alone is worth hiring a pro.
Ceiling Repairs
Working overhead is exhausting and tricky. Ceiling repairs also tend to be more visible because of how light hits them. Any imperfection shows. Professionals have the equipment and technique to handle ceiling work efficiently. We’ve written extensively about why ignoring ceiling damage can cost you more than you think.
Multiple Areas or Large Projects
If you’ve got damage in several rooms or extensive repairs needed, the time investment for DIY becomes enormous. Professionals can complete in a day what might take you several weekends.
IV. The Real Cost Comparison: DIY vs. Professional
Let’s talk money: because that’s often the deciding factor.
DIY Costs
- Patch kit: $10-$55
- Joint compound: $8-$15
- Sandpaper: $5-$10
- Paint: $25-$50
- Tools (if you don’t have them): $20-$40
- Total: $50-$170 for materials
Sounds cheap, right? But consider these hidden costs:
- Your time (a weekend or more for larger repairs)
- Mistakes that require buying more materials
- Renting texture equipment ($50-$100/day)
- Repainting entire walls if the patch doesn’t blend
Professional Costs
Professional drywall patching typically ranges from $150-$400 for small to medium repairs, depending on your location and the complexity of the work.
The Value Equation
Here’s what you’re really paying for with a professional:
- Expertise to identify hidden problems
- Speed: what takes you a weekend takes them hours
- Durability: professional repairs last longer
- Invisible results: proper texture and paint matching
- Peace of mind: no worry about whether you did it right
When you factor in the value of your time and the risk of a botched DIY job, professional services often make more financial sense than they initially appear.
V. Key Questions to Ask Yourself
Still not sure which route to take? Run through this quick checklist:
- Is the damage larger than 6 inches? → Call a pro
- Is there any sign of water damage or mold? → Definitely call a pro
- Do you need the repair to be invisible? → Consider a pro
- Is the damage on a ceiling? → Strongly consider a pro
- Do you have the time and patience for a learning curve? → DIY might work
- Is this in a low-visibility area (closet, garage)? → DIY is fine
VI. Frequently Asked Questions
How long does a professional drywall repair take?
Most small to medium repairs can be completed in a single visit, typically 2-4 hours including drying time for texture and paint.
Can I paint over a drywall patch the same day?
Joint compound needs to dry completely before painting: usually 24 hours. Rushing this step leads to visible patches and peeling paint.
How do I know if there’s mold behind my damaged drywall?
Signs include musty odors, discoloration, bubbling paint, or any history of water leaks. When in doubt, have a professional assess it. Mold is nothing to mess with.
Will a patch always be visible?
With proper technique, texture matching, and full-wall painting, professional repairs should be virtually invisible. DIY patches are more likely to show.
How soon should I repair drywall damage?
Sooner is better. Small cracks can grow, and water damage can lead to mold within 24-48 hours. Check out our article on why that small drywall crack could lead to bigger problems.
VII. Making the Right Call for 2026
The truth is, there’s no universal answer to whether you need a pro. Small, simple repairs in low-visibility areas? Grab a patch kit and go for it. Anything involving water damage, large holes, texture matching, or ceilings? Your best bet is calling in experienced help.
At The Drywall Patch Guys, we’re always happy to take a look and give you an honest assessment. Sometimes we tell folks they can handle it themselves: and when they can’t, we’re here to make sure the job gets done right.
Whatever you decide, you now have the knowledge to make an informed choice. And that’s what matters most.