Uncategorized
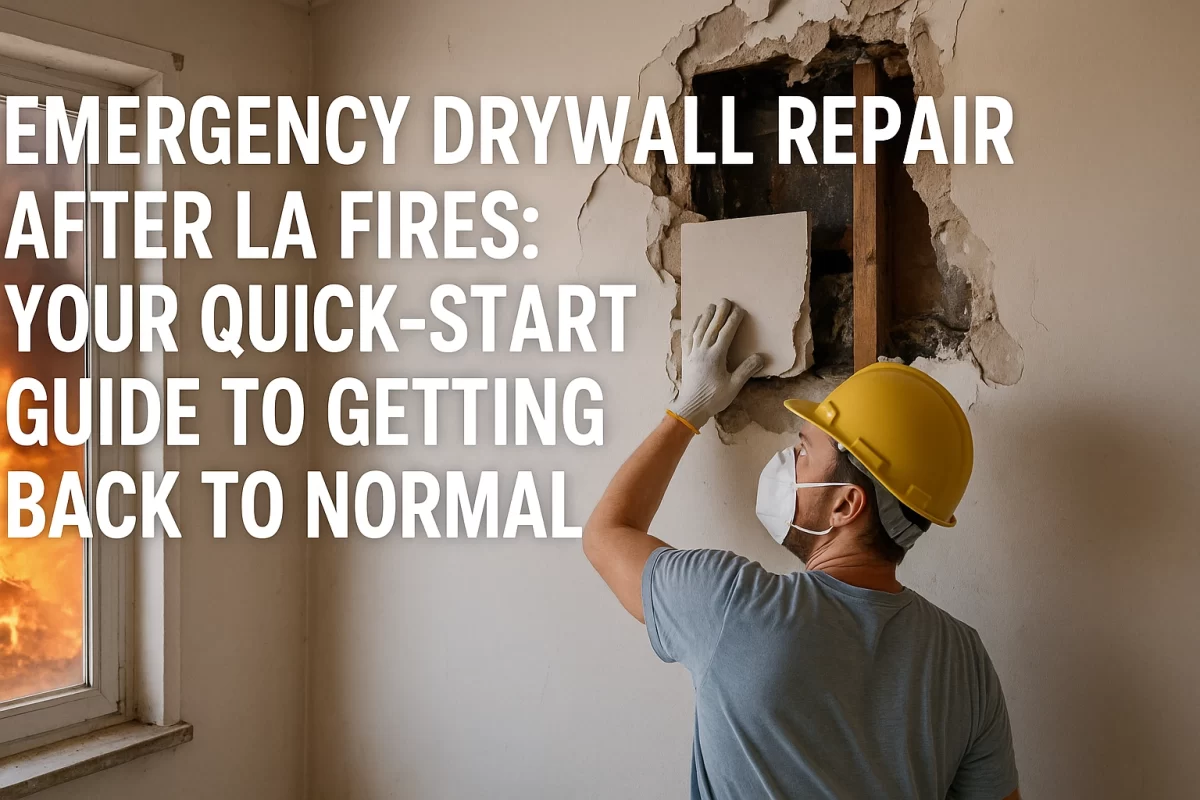
Emergency Drywall Repair After LA Fires: Your Quick-Start Guide to Getting Back to Normal
Jan
When fire damage strikes your Los Angeles home, getting your drywall repaired quickly becomes a top priority for returning to normal life. Whether you’ve experienced smoke damage, water damage from firefighting efforts, or direct fire exposure, this comprehensive guide will walk you through the essential steps needed to restore your walls effectively and safely.
By the end of this guide, you’ll be equipped with the knowledge to assess damage, gather the right materials, and execute proper repair techniques. We’ll also help you understand when it’s crucial to call in professional help versus handling repairs yourself. You’ll gain valuable insights into the restoration process that will save you time, money, and ensure your family’s safety.
I. Initial Safety Assessment and Damage Evaluation
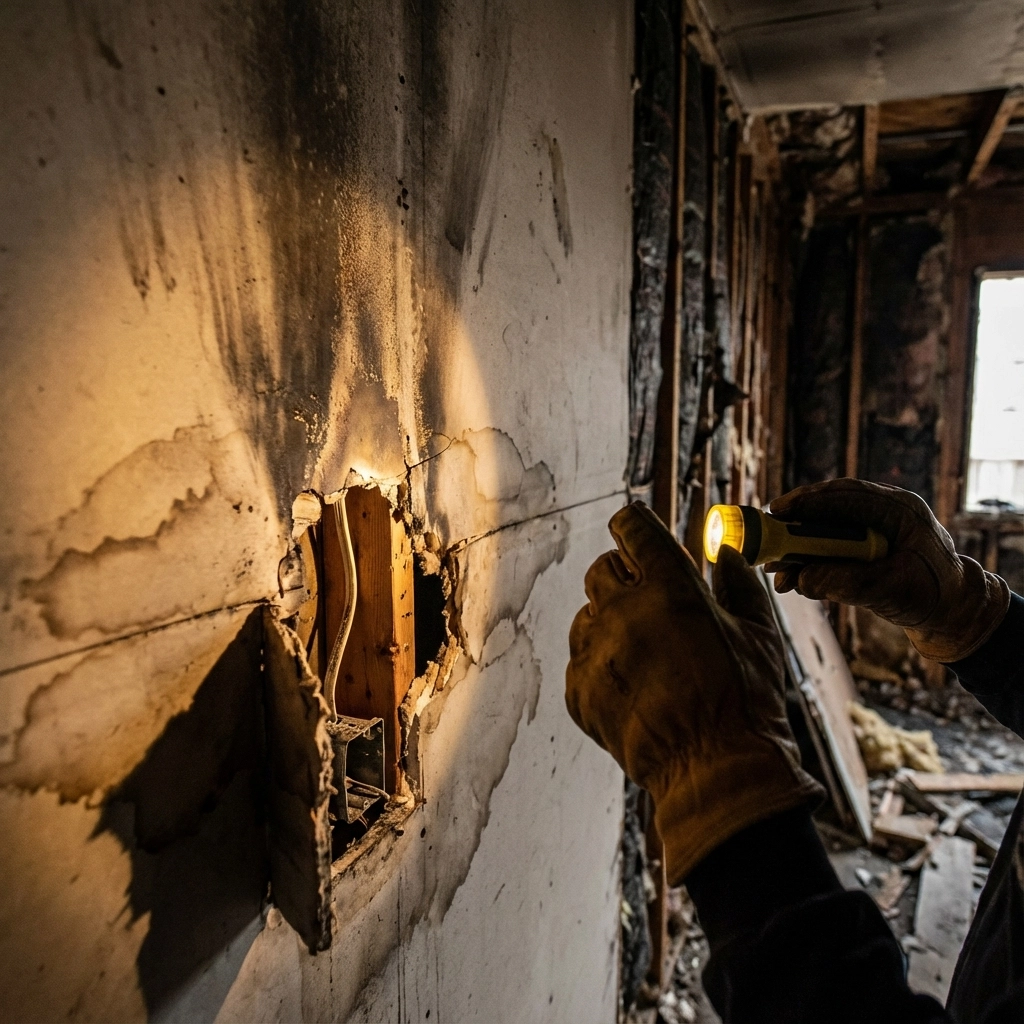
Before you begin any emergency drywall repair work, it’s essential to conduct a thorough safety assessment of your property. This critical first step cannot be overlooked, as fire damage often creates hidden structural hazards that aren’t immediately visible.
Structural Integrity Check
We strongly recommend having a qualified structural engineer inspect your property before you attempt any repairs. This professional evaluation should examine your roof, support beams, wall studs, and foundation for fire-related weakening. Fire can compromise structural elements even when damage appears superficial, making this inspection non-negotiable for your safety.
Identifying Different Types of Damage
Not all fire-damaged drywall requires complete replacement. You’ll encounter three main categories of damage:
- Surface smoke damage: Often appears as discoloration or soot residue that may be cleanable
- Water damage from firefighting efforts: Creates saturation that compromises drywall integrity
- Direct fire damage: Results in charring, burning, or structural weakening
Salvageable vs. Replacement Assessment
Drywall with only surface smoke damage may be restored through professional cleaning techniques like ozone treatment or specialized deodorization processes. However, water-saturated drywall cannot be dried effectively while maintaining its structural integrity and mold resistance, requiring complete replacement.
II. Essential Materials and Tools for Emergency Repairs
In this section, we’ll outline everything you need to execute professional-quality drywall patch repairs. Having the right tools and materials ready before you begin will streamline your repair process and ensure lasting results.
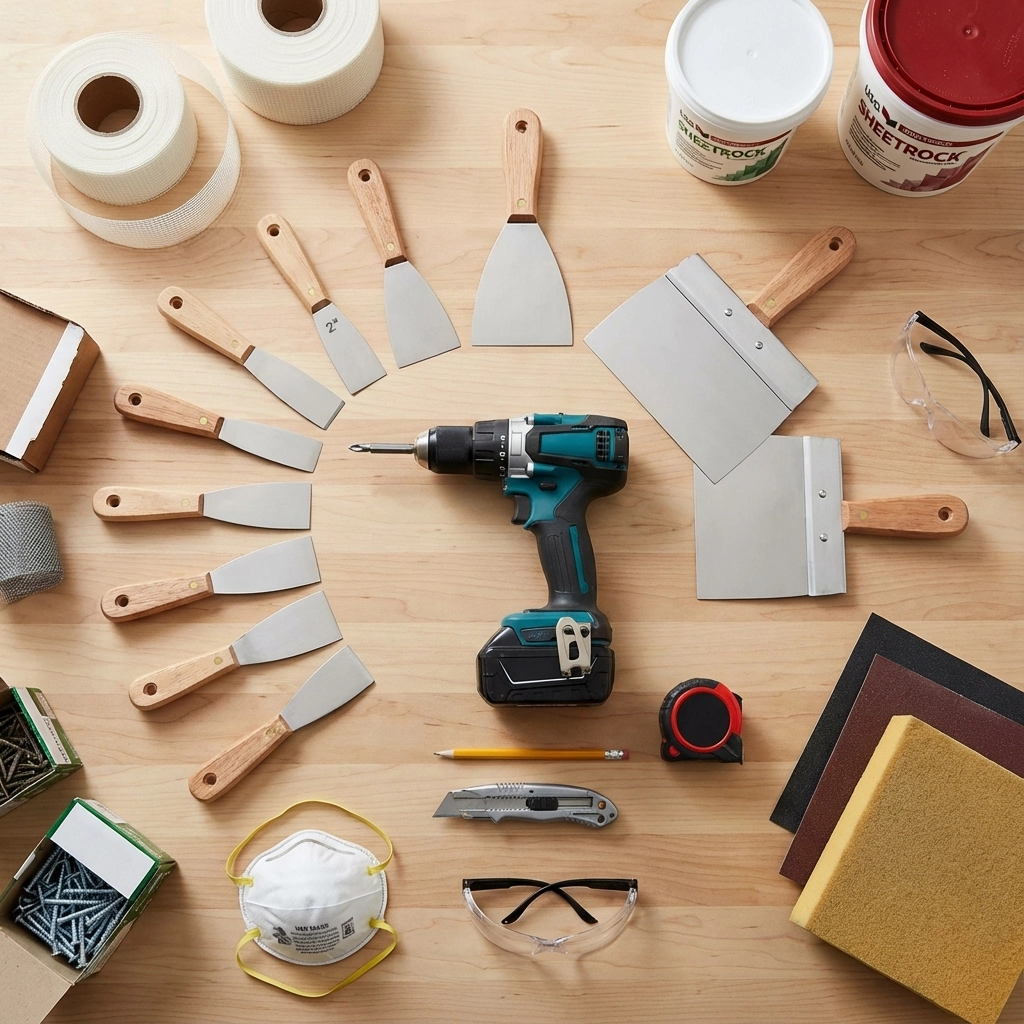
Core Tools You’ll Need
- Putty knife (4-inch and 6-inch)
- Broad knife (10-12 inch)
- Drywall saw and sharp utility knife
- Cordless drill with screwdriver bits
- Oscillating multi-tool for precision cuts
- 120-grit sandpaper and sanding blocks
- Dust masks and safety glasses
- Measuring tape and straightedge
Materials for Lasting Repairs
- Pre-mixed joint compound (lightweight formula recommended)
- Mesh drywall tape (superior to paper tape for patches)
- Drywall screws (1¼ inch for ½ inch drywall)
- Replacement drywall sheets
- Primer designed for new drywall
- Paint matching your existing walls
Professional-Grade Additions
For extensive repairs, consider investing in commercial-grade equipment like air scrubbers and dehumidifiers to create optimal working conditions and prevent secondary damage during the repair process.
III. Step-by-Step Emergency Repair Process
Now it’s time to execute the actual drywall restoration work. This detailed process will guide you through each stage, ensuring you achieve professional results that will stand the test of time.
Phase 1: Removal and Preparation
Begin by carefully removing all damaged drywall sections. Use your oscillating multi-tool to make precise cuts along stud lines, ensuring clean edges for your patches. Remove debris thoroughly, cleaning all surfaces with appropriate cleaning solutions to eliminate soot and residue.
Create a clean, dry workspace by using fans and dehumidifiers to reduce moisture levels. This preparation phase is crucial for preventing mold growth and ensuring proper adhesion of new materials.
Phase 2: Cutting and Fitting Replacement Pieces
Measure your repair areas precisely, marking stud locations with a straightedge. Cut replacement drywall pieces to fit exactly, leaving minimal gaps. Test-fit each piece before applying any compounds or fasteners.
For larger patches, you’ll need to install backing support. Cut furring strips to span behind the patch area, securing them to existing studs with screws. This backing provides essential support for your patch.
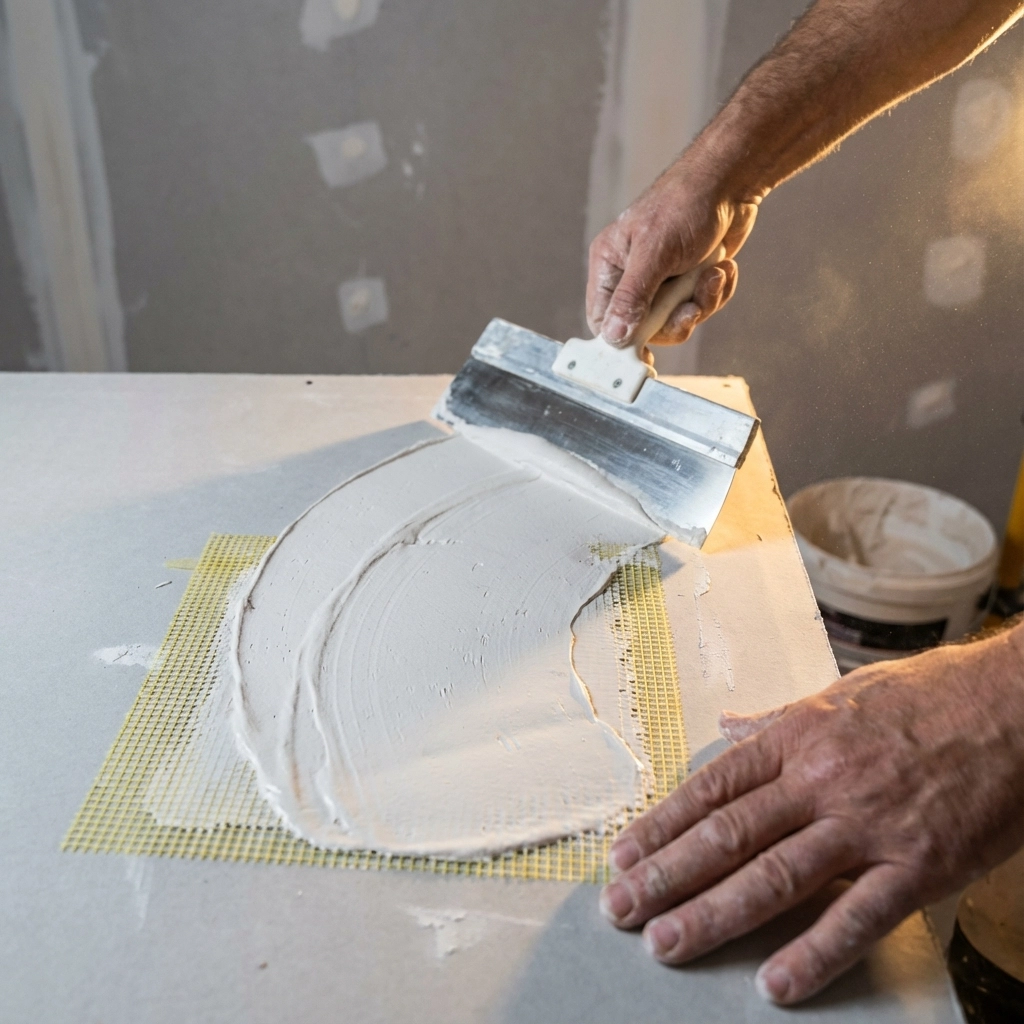
Phase 3: Installation and Initial Compound Application
Secure your drywall patches using drywall screws spaced every 6-8 inches along the edges. Drive screws slightly below the surface without breaking the paper facing. This technique ensures smooth finishing later.
Apply your first coat of joint compound, embedding mesh tape along all seams. Use your 4-inch putty knife to smooth the compound, feathering edges to blend with existing surfaces. Allow this base coat to dry completely before proceeding.
Phase 4: Finishing and Smoothing
Apply a second coat of compound using your broad knife, extending coverage beyond the first coat to create seamless transitions. This coat should be thinner and wider than your base application.
After the second coat dries, sand all surfaces smooth using 120-grit sandpaper. Work methodically to eliminate ridges and imperfections. Apply a final thin coat if necessary to achieve perfectly smooth results.
IV. Professional Finishing Techniques
The difference between amateur and professional-looking results lies in the finishing details. These techniques will ensure your emergency drywall repair blends seamlessly with existing surfaces.
Texture Matching
If your walls have texture, you’ll need to replicate this pattern on your repaired areas. Common techniques include:
- Orange peel texture: Created using a spray bottle or textured roller
- Knockdown texture: Applied with a trowel and lightly flattened
- Skip trowel: Hand-applied using a trowel in random patterns
Practice your texture technique on scrap drywall before applying it to your repair areas.
Priming and Painting Strategy
Prime all repaired areas with high-quality drywall primer before painting. This step ensures proper paint adhesion and prevents the compound from absorbing paint unevenly. Use thin, even coats of paint, allowing proper drying time between applications.
V. When to Call Professional Restoration Services
While many drywall repairs can be handled by motivated homeowners, certain situations require professional intervention. Understanding these scenarios will help you make informed decisions about your restoration project.
Extensive Water Damage Scenarios
If water from firefighting efforts has penetrated your insulation or structural components, professional restoration becomes essential. These specialists have industrial-grade equipment for moisture extraction and can prevent dangerous mold growth that threatens your family’s health.
Structural Damage Concerns
Any situation involving compromised load-bearing elements requires immediate professional assessment. Fire can weaken structural components in ways that aren’t immediately apparent, making expert evaluation crucial for your safety.
Insurance and Timeline Considerations
Professional restoration services typically complete repairs within 30 days of insurance approval. They also handle insurance documentation and claims processing, reducing your administrative burden during an already stressful time.
Emergency Response Capabilities
Professional teams can arrive within hours to assess damage, implement emergency stabilization measures, and begin the restoration process immediately. This rapid response is crucial for preventing secondary damage and accelerating your return to normal living conditions.
Frequently Asked Questions About Fire-Damaged Drywall
Q: How quickly do I need to address fire-damaged drywall?
You should begin assessment and stabilization within 24-48 hours of the fire. Water damage from firefighting efforts can lead to mold growth within 72 hours, making prompt action essential for preventing additional problems.
Q: Can I live in my home while making drywall repairs?
This depends on the extent of damage and air quality conditions. If smoke odors persist or dust levels are high, temporary relocation may be necessary, especially for family members with respiratory sensitivities.
Q: Will my insurance cover emergency drywall repairs?
Most homeowner’s insurance policies cover fire damage restoration, including drywall replacement. Document all damage thoroughly with photos and keep detailed records of repair expenses for your claims process.
Q: How can I prevent smoke odors from returning after repairs?
Proper sealing with specialized primers designed for smoke damage is crucial. In severe cases, ozone treatment or thermal fogging may be necessary to eliminate persistent odors completely.
By following this comprehensive guide, you’ll be well-equipped to tackle your emergency drywall repair project with confidence. Remember that safety should always be your top priority, and don’t hesitate to consult with professionals when dealing with extensive damage or structural concerns. With proper preparation and technique, you can restore your walls to their pre-fire condition and get your life back to normal.