Uncategorized
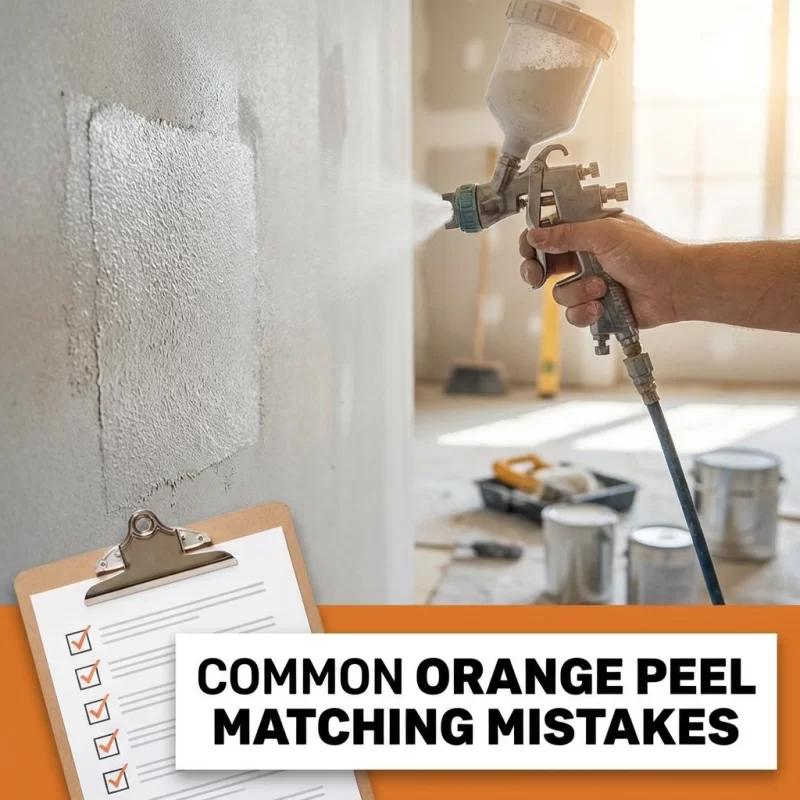
Are You Making These Common Orange Peel Texture Matching Mistakes? (Quick Guide for General Contractors)
Jan
Orange peel texture matching can make or break a repair job’s professional appearance. Even the most skilled general contractors occasionally struggle with achieving seamless texture matches that blend invisibly with existing walls. The difference between a repair that screams “patch job” and one that disappears completely often comes down to avoiding a handful of critical mistakes.
In this comprehensive guide, we’ll walk you through the most common orange peel texture matching errors that can undermine your reputation and cost you callbacks. You’ll gain valuable insights into proper preparation techniques, application methods, and finishing strategies that separate amateur work from professional results. By the end of this article, you’ll be equipped with the knowledge to consistently deliver invisible repairs that satisfy even the most discerning clients.
The stakes are higher than ever in today’s competitive construction market. Property managers and homeowners have become increasingly sophisticated about quality expectations, and a poorly matched texture repair can quickly damage your professional reputation. Let’s dive into the specific mistakes you need to avoid and the proven techniques that ensure success.
I. Understanding Orange Peel Texture Fundamentals
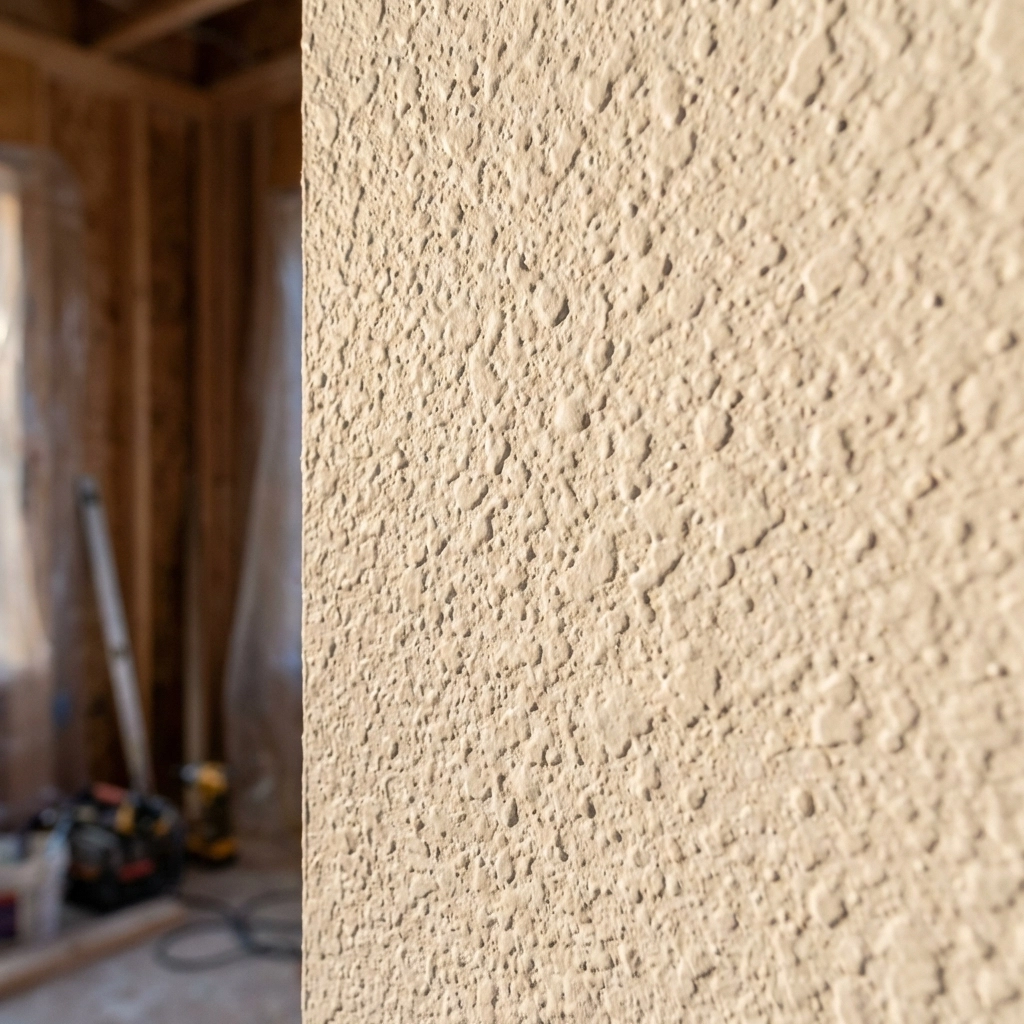
Before addressing common mistakes, it’s essential to understand what makes orange peel texture unique. This popular wall finish gets its name from its resembling the dimpled surface of an orange skin. The texture consists of small, randomly distributed bumps created by spraying diluted joint compound through a specialized hopper gun.
The key characteristics that define quality orange peel texture include consistent density patterns, uniform bump size distribution, and proper coverage without gaps or heavy spots. Professional contractors recognize that successful matching requires understanding these fundamental elements before attempting any repair work.
Orange peel texture comes in three primary densities: fine, medium, and heavy. Fine texture features smaller, more closely spaced bumps, while heavy texture displays larger, more pronounced dimples with greater spacing between peaks. Medium texture falls between these extremes and represents the most common application in residential and commercial properties.
II. Critical Mistake #1: Inconsistent Texture Mixture Consistency
The most frequent error contractors make involves preparing texture mixture to the wrong consistency. Your texture compound must achieve the perfect balance: too thick and it won’t spray properly, creating uneven coverage and clogged equipment. Too thin, and you’ll end up with flat, weak texture that lacks the characteristic orange peel appearance.
The mixture should be “pretty soupy” when initially prepared, allowing it to pour easily into your hopper gun. However, many contractors make the mistake of using this initial consistency immediately. Professional technique requires allowing the mixture to set for approximately 10 minutes after initial mixing, then remixing to achieve the exact consistency needed for your specific application.
During this waiting period, the compound begins to thicken slightly, developing the ideal viscosity for creating uniform texture patterns. Test your mixture consistency on a scrap piece of drywall before proceeding to the actual repair area. The spray pattern should produce consistent, well-formed bumps without excessive runoff or splatter.
Temperature and humidity significantly affect mixture behavior, so you’ll need to adjust your preparation technique based on environmental conditions. In hot, dry conditions, your mixture may require additional water to maintain proper consistency throughout the application process.
III. Critical Mistake #2: Failing to Match Existing Texture Density
Matching the exact texture density of surrounding walls represents one of the most challenging aspects of orange peel repair work. Many contractors underestimate the importance of this step, assuming that “close enough” will suffice. Unfortunately, even slight variations in density become glaringly obvious once the repair cures and receives paint.
Start by carefully examining the existing texture under proper lighting conditions. Use a bright work light positioned at various angles to reveal the true character of the texture pattern. Pay attention to the size of individual bumps, spacing between texture elements, and overall coverage density.
Create test samples using different air pressures and mixture consistencies until you achieve a perfect match. Professional contractors often prepare multiple test patches, allowing each to cure completely before making their final selection. This extra time investment pays dividends in client satisfaction and reduced callbacks.
Remember that texture appearance changes as it dries, so your test samples must cure for at least 24 hours before making final comparisons. Wet texture appears darker and more pronounced than the final dried result, leading to poor matching decisions if you rush this crucial evaluation step.
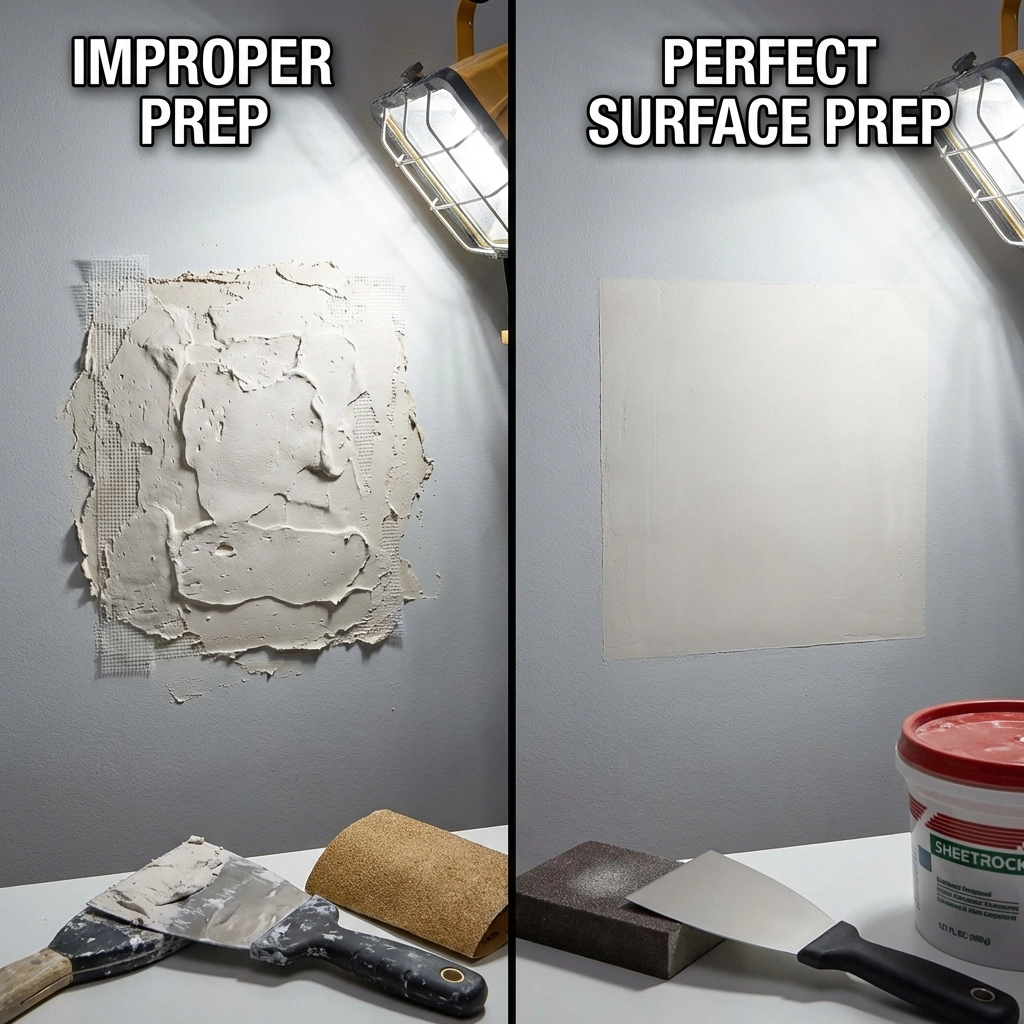
IV. Critical Mistake #3: Inadequate Surface Preparation
Surface preparation mistakes destroy texture matching success before you even begin spraying. The repair area must be perfectly flush with the surrounding wall surface: any high or low spots will telegraph through the texture, creating visible imperfections that no amount of skillful application can disguise.
Apply multiple layers of joint compound, sanding between each coat to ensure smooth, even surfaces. Many contractors rush this process, accepting less-than-perfect preparation in the interest of time savings. However, inadequate preparation virtually guarantees visible repair lines and customer complaints.
Pay special attention to the perimeter where your repair meets existing texture. This transition zone requires careful sanding to ensure that joint compound fills all valleys between existing texture bumps. Use progressively finer sandpaper grits, finishing with 220-grit for the smoothest possible transition.
Prime all repair areas with high-quality primer before applying texture. Unprimed surfaces absorb moisture differently than surrounding areas, potentially causing texture inconsistencies and color variations that become apparent after painting.
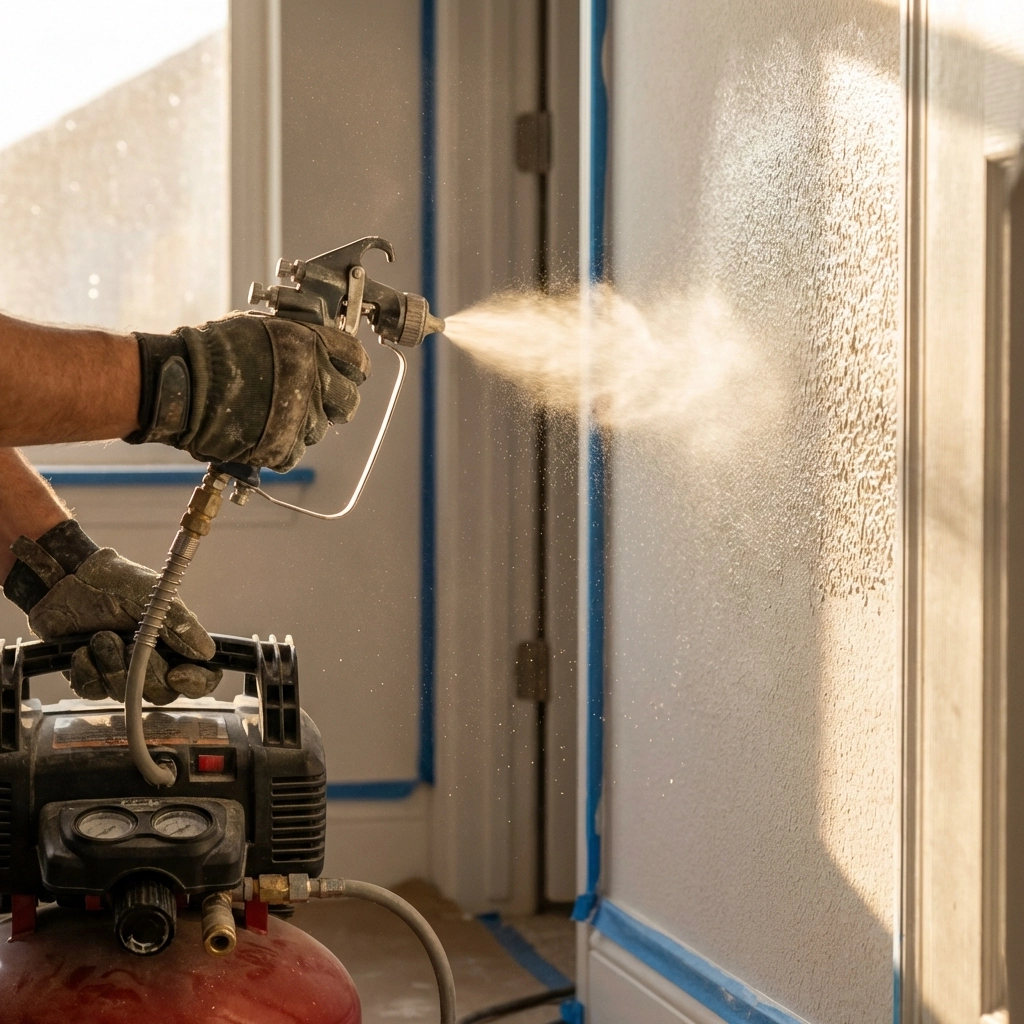
V. Critical Mistake #4: Incorrect Air Pressure and Application Technique
Orange peel texture requires precisely 60 psi for optimal results. Many contractors guess at air pressure settings or use whatever pressure worked for their last job, leading to inconsistent texture patterns that don’t match existing wall surfaces.
Invest in a reliable pressure gauge and check your settings before each application. Too little pressure produces large, irregular splots instead of the characteristic fine spray pattern. Excessive pressure creates overspray and uneven coverage, while potentially damaging surrounding surfaces with aggressive spray patterns.
Maintain consistent distance from the wall surface throughout application: typically 18 to 24 inches depending on your specific equipment and mixture consistency. Varying this distance creates noticeable variations in texture density that become obvious once the repair cures.
Avoid creating unwanted lines by using proper spray gun movement patterns. Apply texture using random, overlapping motions rather than straight lines or geometric patterns. If lines do appear, immediately remove them using a damp sponge before the texture begins to set.
VI. Critical Mistake #5: Poor Masking and Protection Strategies
Inadequate masking leads to time-consuming cleanup work and potential damage to finished surfaces. Professional contractors invest significant time in proper preparation, knowing that overspray cleanup often takes longer than the actual texture application.
Use high-quality painter’s tape and plastic sheeting to protect all surfaces within the spray area. Pay particular attention to ceiling lines, adjacent walls, and floor surfaces. Even minor overspray can require extensive cleanup efforts and potentially damage finished surfaces.
Remove masking materials while the texture remains slightly damp: waiting too long can cause the tape to pull away cured texture, creating ragged edges that require additional repair work. However, removing protection too early risks overspray contamination, so timing becomes crucial for optimal results.
Consider using lightweight cardboard or foam core boards for complex masking situations. These materials provide better protection than plastic alone while remaining easy to position and remove during the application process.
VII. Professional Tips for Consistent Success
Successful orange peel texture matching requires attention to environmental factors that many contractors overlook. Temperature and humidity significantly affect both mixture behavior and curing characteristics. Ideal conditions include temperatures between 65-75°F with relative humidity below 50%.
Keep detailed records of successful mixture ratios, air pressure settings, and environmental conditions for different job sites. This documentation helps you replicate successful results and troubleshoot problems when they occur.
Practice your technique regularly on scrap materials. Muscle memory plays a significant role in consistent texture application, and regular practice helps maintain the steady hand control necessary for professional results.
VIII. When to Call Professional Help
Recognize when texture matching challenges exceed your current skill level or equipment capabilities. Extremely heavy textures, complex repair areas, or high-visibility locations may require specialized expertise to achieve acceptable results.
Professional drywall repair services like The Drywall Patch Guys have specialized equipment and extensive experience with challenging texture matching situations. Sometimes, subcontracting this work proves more cost-effective than investing in specialized equipment or risking callbacks from unsatisfied clients.
Don’t let pride prevent you from seeking help when appropriate: your reputation depends on delivering consistent, professional results regardless of how you achieve them.
Orange peel texture matching mastery develops over time through careful attention to detail and consistent technique. By avoiding these common mistakes and following proven preparation and application methods, you’ll achieve the invisible repairs that distinguish professional contractors from amateur competitors. Remember that every successful repair builds your reputation while every visible patch job potentially costs you future opportunities.